Making an Astrological Clock V
This article is the fifth of a series where I build a digital clock to show real-time astronomical locations of planetary bodies.
In my first post, we wrote a script to calculate astronomical positions of the seven classical planets. In my second post, we verified the accuracy of the results of these calculations versus high-quality scientific data. In the third post we turned our astronomy measurements into astrology terms along the zodiac. Finally, in my fourth post we got an Arduino running a simple clock. See my GitHub repository that contains the code for this project.
Today is an exciting day, because we finally will pull everything together! First we will talk about the code for calculating the planet's positions, then we will talk about the astrological glyphs. And then we will show off a working product.
Calculating the Planet's Positions
The code to calculate the planet's positions is largely identical to the Python code we built previously. There are only a handful of changes I want to point out, but take a look at the GitHub repository if you are interested in more details.
In the first place, the Arduino Nano only has 2 kB of dynamic memory. Furthermore, our 128x64 pixel display uses up 1 kB of that dynamic memory! That means we have to be really careful about how we store the doubles that are our orbital elements. It actually worked out that, rather than calculating and storing the doubles the entire time, we just recalculate them every time we need them. It saves us a lot of space and it's not a pricey calculation.
// the orbital elements for the seven classical planets, dependent on julian day d
void get_orbital_elements(int it, double d, double &N, double &i, double &w, double &a, double &e, double &M) {
  switch(it) {
    case 0: N = 0.0; i = 0.0; w = 282.9404 + 4.70935e-5 * d; a = 1.000000; e = 0.016709 - 1.151e-9 * d; M = 356.0470 + 0.9856002585 * d; break;
    case 1: N = 125.1228 - 0.0529538083 * d; i = 5.1454; w = 318.0634 + 0.1643573223 * d; a = 60.2666; e = 0.054900; M = 115.3654 + 13.0649929509 * d; break;
    case 2: N = 48.3313 + 3.24587e-5 * d; i = 7.0047 + 5.00e-8 * d; w = 29.1241 + 1.01444e-5 * d; a = 0.387098; e = 0.205635 + 5.59e-10 * d; M = 168.6562 + 4.0923344368 * d; break;
    case 3: N = 76.6799 + 2.46590e-5 * d; i = 3.3946 + 2.75e-8 * d; w = 54.8910 + 1.38374e-5 * d; a = 0.723330; e = 0.006773 - 1.302e-9 * d; M = 48.0052 + 1.6021302244 * d; break;
    case 4: N = 49.5574 + 2.11081e-5 * d; i = 1.8497 - 1.78e-8 * d; w = 286.5016 + 2.92961e-5 * d; a = 1.523688; e = 0.093405 + 2.516e-9 * d; M = 18.6021 + 0.5240207766 * d; break;
    case 5: N = 100.4542 + 2.76854e-5 * d; i = 1.3030 - 1.557e-7 * d; w = 273.8777 + 1.64505e-5 * d; a = 5.20256; e = 0.048498 + 4.469e-9 * d; M = 19.8950 + 0.0830853001 * d; break;
    case 6: N = 113.6634 + 2.38980e-5 * d; i = 2.4886 - 1.081e-7 * d; w = 339.3939 + 2.97661e-5 * d; a = 9.55475; e = 0.055546 - 9.499e-9 * d; M = 316.9670 + 0.0334442282 * d; break;
  }
}
Our device uses 7-bit units to store data. I worked out the approximate accuracy loss that storing our Julian day d in this format gets us. I believe it's accurate down to about 30 seconds or so. Remember when I said we wanted to be accurate to 1-2 arc-minutes? That will work out fine if we are off on the time by 30 seconds. But it's a fundamental limitation of our device, and as a result I won't bother updating the screen more than once every 30 seconds.
The other oddity you might pick out in the code is how we store strings. Since these strings are static, we can store them in the 30 kB of flash memory rather than using up precious dynamic memory. The syntax gets a little odd, but it saves us a lot of space; the strings eat up our dynamic memory very quickly.
const char sun[] PROGMEM = "SUN";
const char mon[] PROGMEM = "MON";
const char tue[] PROGMEM = "TUE";
const char wed[] PROGMEM = "WED";
const char thu[] PROGMEM = "THU";
const char fri[] PROGMEM = "FRI";
const char sat[] PROGMEM = "SAT";

const char* const daysOfTheWeek[] PROGMEM = {
  sun,
  mon,
  tue,
  wed,
  thu,
  fri,
  sat
};

// string buffer needed to store strings before printing
char buffer[24];

// when we need to print, we use the following
strcpy_P(buffer, (char*)pgm_read_ptr(&(daysOfTheWeek[weekday])));
display.print(buffer);
Astrological Glyphs
At the smallest text size, each character is 5x7 pixels, with 1 pixel of horizontal spacing between each character. I was able to sketch some 5x7 planet glyphs that I was satisfied with.

The zodiac signs were a little harder, and I decided to increase the size slightly to 7x7 pixels for these glyphs. This is the only way I was able to get Capricorn or to distinguish Virgo and Scorpio.

The Working Product
After all our work, we can finally display our finished product. Here I've set the clock to Central Daylight Time.
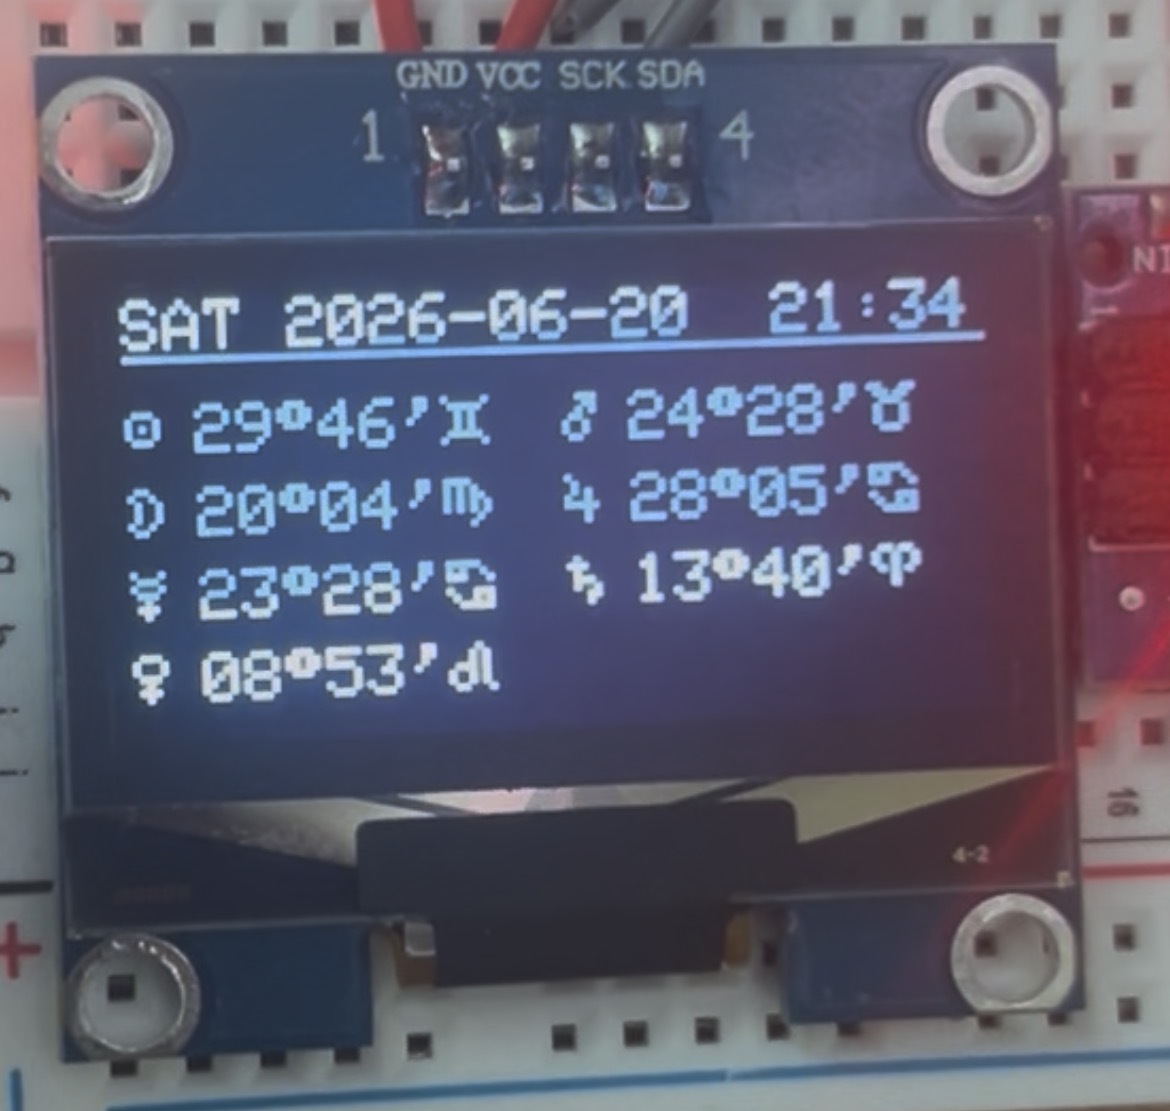
I'm very happy with this product. It fits my original specifications very well! I can see the arc-degree and arc-minutes of each planet within each zodiacal sign, and I can see the current weekday, date, and time. The symbols look fine on the screen, about as legible as the text surrounding. I confirmed by hand once more that all of our positions are accurate to +/- 1 arc-minute here. Fantastic!
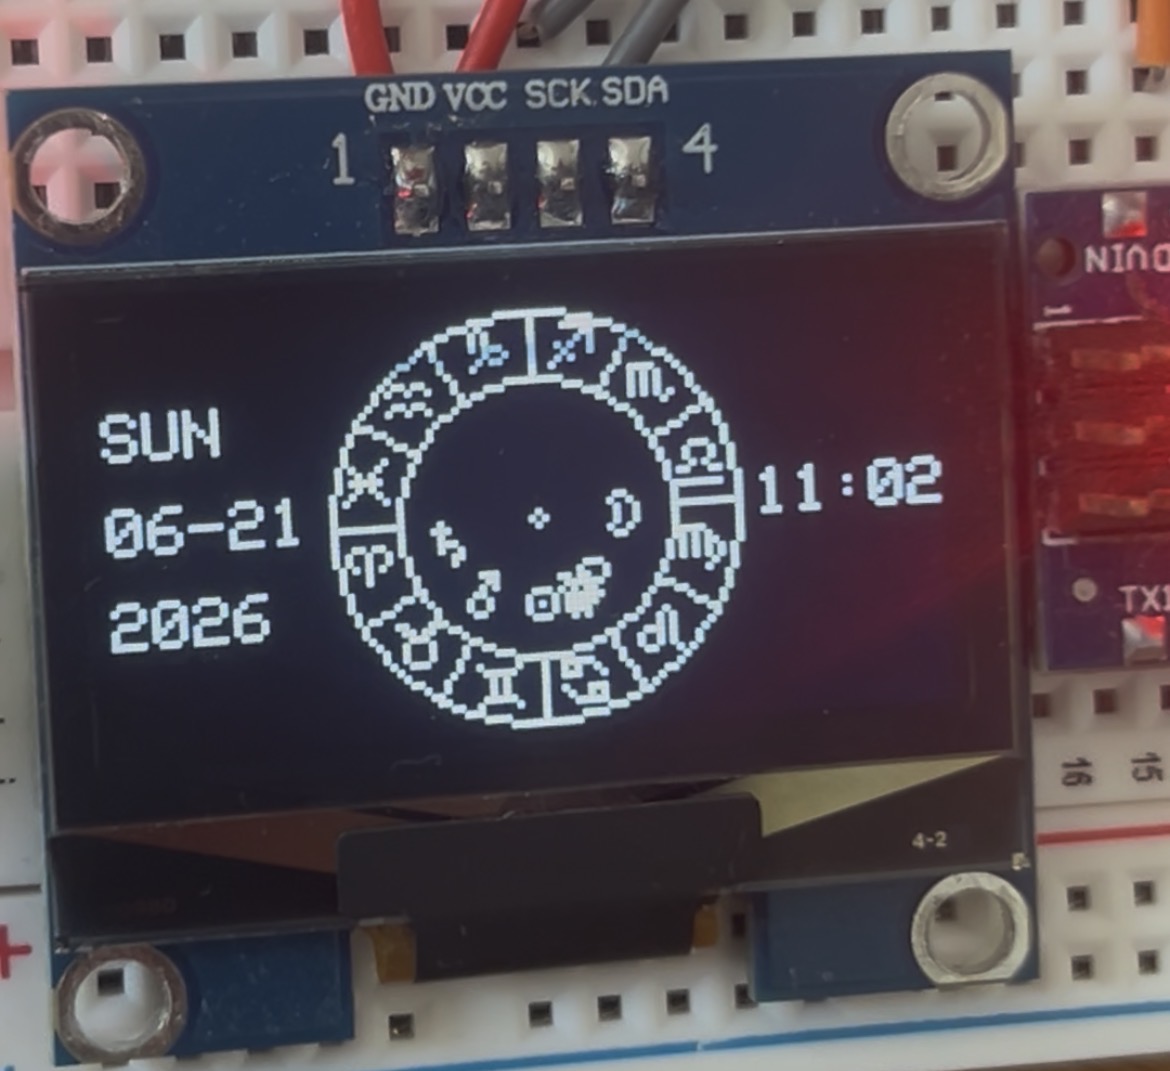
The table may not be the most graphically creative approach, although it's my favorite. As an alternative, I have sketched up two other prototype designs. The first is a more traditional wheel shape. I don't display the position in arc-degrees here, and the planetary symbols get a little messy when overlapping, so I didn't opt for this approach.
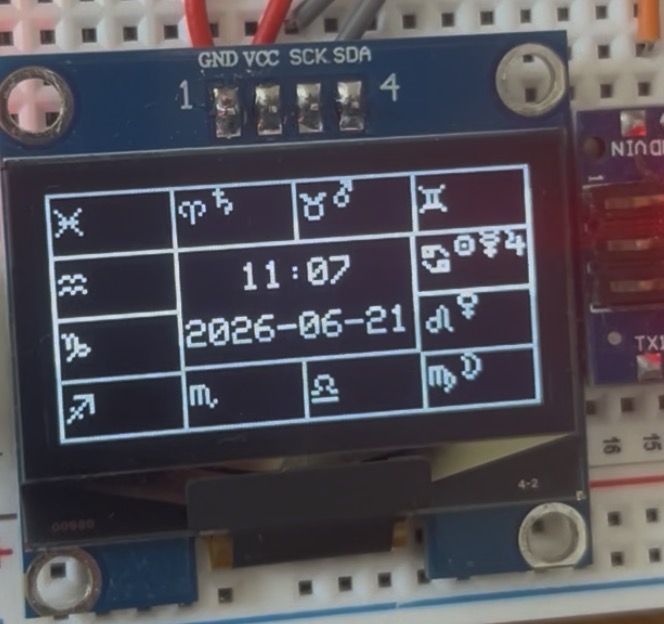
The other alternative, perhaps a bit cleaner, is a "squared" horoscope wheel. In this example, I am just putting the planetary symbols in one of 12 boxes along the rim of the display. This leaves the center for the date and time.
All three of these are in the GitHub repository as separate scripts if you would like to use them.
Future Improvements
If we wanted to take this further, I have a few notes. I tried to display when a planet was in apparent retrograde motion (maybe with an "R" on the display), but we simply are out of program space. We are using up about 85% of the flash memory now, so we'd likely need to upgrade to a bigger Arduino for that calculation. Now, we could opt to solder the connections and mount the entire product in a plastic box. I might end up doing this, and I'll be sure to update with another post if I do. You could also add an on/off switch, which would be very helpful to prevent burn-in of the pixels on the screen.
Otherwise, that about wraps up this project. Thanks for reading this far, I'm pretty happy with how it turned out!